Introduction: Why Save Seeds?
Seed saving is one of humanity's oldest practices, dating back to the beginning of agriculture. For thousands of years, farmers and gardeners have carefully selected, saved, and shared seeds, developing locally adapted varieties that thrive in specific environments and meet cultural preferences.
Today, seed saving has taken on renewed importance as we face challenges like climate change, loss of agricultural biodiversity, and increasing corporate control of seed supplies. By saving seeds, you can:
- Preserve biodiversity by maintaining traditional and locally adapted varieties
- Develop resilient crops that are adapted to your specific growing conditions
- Save money by reducing the need to purchase seeds each season
- Increase food sovereignty by maintaining control over your food supply
- Connect with cultural heritage by growing and preserving traditional varieties
- Build community through seed exchanges and sharing knowledge
This guide provides practical information on seed saving techniques applicable to African contexts, with an emphasis on preserving indigenous crop varieties and adapting to local conditions.
Seed Sovereignty in Africa
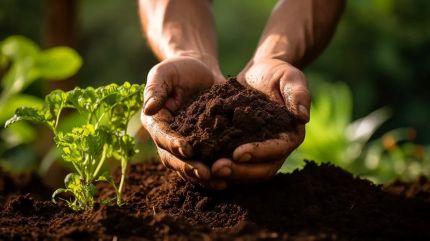
Africa is home to incredible crop diversity, with countless locally adapted varieties developed over generations. These seeds are not just food sources but carry cultural significance and traditional knowledge. By saving seeds, you help preserve this living heritage and strengthen local food systems against external pressures.

Traditional seed varieties represent generations of agricultural knowledge and adaptation.
Seed Saving Basics
Before diving into specific techniques, it's important to understand some fundamental concepts about how plants reproduce and what this means for seed saving.
Plant Reproduction Types
Plants reproduce in different ways, which affects how they should be managed for seed saving:
1
Self-Pollinating Plants
These plants typically pollinate themselves before the flower even opens, making them the easiest for beginning seed savers. They generally produce seeds that grow "true to type," meaning the offspring will closely resemble the parent plant.
Examples: Tomatoes, peppers, beans, peas, lettuce, okra
2
Cross-Pollinating Plants
These plants rely on wind, insects, or other pollinators to transfer pollen between flowers, often between different plants. They readily cross with other varieties of the same species, which can result in seeds that don't grow true to type unless isolation techniques are used.
Examples: Maize (corn), squash, melons, cucumbers, onions, brassicas (cabbage, kale)
3
Biennial Plants
These plants complete their life cycle over two growing seasons, producing seeds only in their second year. This requires overwintering the plants or roots, which can be challenging in some climates.
Examples: Carrots, beets, onions, cabbage, parsley
Understanding Plant Families
Plants within the same family can often cross-pollinate with each other. Knowing plant families helps you plan your garden to prevent unwanted crosses:
- Solanaceae (Nightshade family): Tomatoes, peppers, eggplants, potatoes
- Cucurbitaceae (Gourd family): Cucumbers, melons, squash, pumpkins
- Fabaceae (Legume family): Beans, peas, cowpeas, groundnuts
- Brassicaceae (Cabbage family): Cabbage, kale, mustard, radish
- Amaranthaceae: Amaranth, spinach, beet
- Poaceae (Grass family): Maize, sorghum, millet, rice
Within each family, different species usually won't cross (e.g., tomatoes won't cross with peppers), but different varieties of the same species often will (e.g., different varieties of maize will readily cross-pollinate).
Isolation Methods
For cross-pollinating plants, you'll need to use isolation techniques to maintain variety purity:
- Distance isolation: Planting varieties far enough apart to prevent cross-pollination. Required distances vary by crop and local conditions.
- Time isolation: Planting varieties so they flower at different times.
- Physical barriers: Using row covers, bags, or cages to prevent pollinators from accessing flowers.
- Hand pollination: Manually transferring pollen between selected flowers and protecting them from other pollen sources.
Hybrid vs. Open-Pollinated Varieties
It's important to understand the difference between hybrid (F1) and open-pollinated varieties:
- Open-pollinated varieties will produce offspring similar to the parent plants when properly isolated.
- Hybrid (F1) varieties are crosses between two distinct parent lines. Seeds saved from hybrids will not grow "true to type" and often produce plants with unpredictable characteristics.
For reliable seed saving, focus on open-pollinated and traditional varieties, not hybrids.
Selecting Plants for Seed Saving
Careful selection is the foundation of successful seed saving and crop improvement. The plants you choose to save seeds from will influence the characteristics of future generations.
Selection Criteria
When choosing which plants to save seeds from, consider these factors:

Select vigorous, healthy plants

Look for natural disease resistance

Consider drought tolerance

Evaluate flavor and quality
- Vigor and health: Select the healthiest, most vigorous plants that have grown well without excessive inputs.
- Disease and pest resistance: Choose plants that show natural resistance to common local diseases and pests.
- Climate adaptation: Select plants that perform well under your local climate conditions (heat, drought, heavy rain, etc.).
- Productivity: Consider yield, but balance this with other desirable traits.
- Flavor and quality: For food crops, taste and culinary quality are essential selection criteria.
- Storage qualities: For crops that need to be stored, select for good keeping qualities.
- Cultural preferences: Consider traditional uses and preferences in your community.
Negative Selection
Just as important as selecting the best plants is removing the worst ones:
- Remove diseased or pest-infested plants before they can flower and cross-pollinate with your seed plants.
- Cull plants showing undesirable traits (poor growth, off-type characteristics, etc.).
- For cross-pollinating crops, remove plants with undesirable traits before flowering to prevent them from contributing pollen.
Population Size
To maintain genetic diversity and vigor, save seeds from multiple plants:
- Self-pollinating crops: Save seeds from at least 6-12 plants.
- Cross-pollinating crops: Save seeds from at least 20-50 plants when possible.
Smaller populations can lead to inbreeding depression (reduced vigor and productivity) over successive generations.
Traditional Selection Practices
Many African communities have developed sophisticated seed selection practices over generations. These often involve community participation, with experienced farmers and elders guiding the selection process based on deep knowledge of local conditions and crop characteristics. Whenever possible, learn from and incorporate these traditional practices, which are often well-adapted to local contexts.
Harvesting and Processing Techniques
Proper harvesting and processing techniques are crucial for obtaining high-quality seeds with good germination rates and longevity.
Timing of Harvest
Seeds should be harvested when they are fully mature but before they are lost to shattering or rot:
- Dry-seeded crops (beans, grains, many herbs): Allow seeds to dry on the plant until the pods or seed heads are completely dry and brittle.
- Wet-seeded crops (tomatoes, cucumbers, melons): Allow fruits to fully ripen, often beyond the eating stage, before harvesting seeds.
Processing Dry Seeds
For crops with dry seeds (beans, grains, okra, most flowers):
1
Harvest
Collect seed pods, heads, or stalks when they are dry and brittle. In humid climates, you may need to harvest slightly earlier and complete drying in a protected area.
2
Threshing
Separate seeds from their pods or husks. Methods include:
- Hand-rubbing between palms
- Beating seed heads in a bag or container
- Treading on seed heads (traditional method for grains)
- Using a mortar and pestle for small quantities
3
Winnowing
Separate seeds from chaff using moving air. Traditional methods include:
- Pouring seeds from one container to another in a light breeze
- Tossing seeds in a flat basket, allowing the wind to blow away chaff
- Using a fan or blower on the lowest setting for small quantities
4
Cleaning
Remove remaining debris, damaged seeds, and off-type seeds through hand sorting or sieving.
5
Final Drying
Ensure seeds are completely dry before storage. Spread in a thin layer in a shaded, well-ventilated area until they are hard and brittle.
Processing Wet Seeds
For crops with seeds embedded in moist flesh (tomatoes, cucumbers, melons, eggplants):
1
Harvest
Allow fruits to fully ripen, often beyond the eating stage. For tomatoes, this means very soft; for cucumbers and melons, this means past the edible stage.
2
Seed Extraction
Cut fruits open and scoop out the seeds with their surrounding gel or pulp.
3
Fermentation (for tomatoes, cucumbers)
Place seeds and pulp in a container with a small amount of water. Let ferment for 2-4 days (depending on temperature) until a layer of mold forms on top. This process breaks down the gel coating and helps control some seed-borne diseases.
4
Washing
Add more water to the fermented mixture, stir vigorously, and allow good seeds to sink. Pour off floating pulp, debris, and immature seeds. Repeat until seeds are clean.
5
Drying
Spread clean seeds in a thin layer on a screen, plate, or cloth (not paper, as seeds may stick). Dry in a shaded, well-ventilated place, stirring occasionally to prevent clumping.
Drying Cautions
Proper drying is critical for seed longevity:
- Never dry seeds in direct sunlight, which can damage them
- Avoid high heat (over 35°C/95°F), which can reduce germination
- In humid climates, consider using desiccants like rice, charcoal, or clay beads in a sealed container (but not in direct contact with seeds)
- Seeds are dry enough for storage when they break rather than bend when folded (for larger seeds) or when they are hard and brittle
Seed Storage Methods
Proper storage is essential for maintaining seed viability. The main enemies of stored seeds are moisture, heat, and pests.
Storage Containers
Choose containers based on your climate and available materials:

Glass jars with tight lids

Traditional calabash containers

Clay pots with sealed lids

Paper envelopes for short-term storage
- Glass jars with tight-fitting lids: Excellent for moisture protection, especially when combined with desiccants.
- Metal containers: Good moisture barriers but can conduct heat; avoid direct sun exposure.
- Traditional containers: Calabashes, clay pots, and gourds can be effective, especially when sealed with wax or clay.
- Paper envelopes: Good for short-term storage in dry climates; allow air circulation but provide little protection against humidity.
- Plastic containers: Use only if airtight; ensure seeds are very dry before sealing to prevent moisture buildup.
Storage Conditions
The ideal storage environment is cool, dry, and protected from pests:
- Temperature: Lower temperatures extend seed life. Aim for below 15°C (60°F) when possible.
- Humidity: Keep relative humidity below 50%. In humid climates, use desiccants.
- Light: Store seeds in darkness to prevent degradation.
- Pest protection: Ensure containers are sealed against insects and rodents.
Traditional Storage Methods
Many effective traditional storage methods have been developed across Africa:
- Ash mixing: Mixing seeds with wood ash to repel insects and absorb moisture.
- Smoke treatment: Hanging seed containers above cooking fires, where smoke acts as a natural insect repellent.
- Botanical preservatives: Adding dried leaves of neem, eucalyptus, or other pest-repellent plants to seed containers.
- Underground storage: Burying sealed containers in dry soil, which maintains a relatively stable temperature.
- Elevated storage: Keeping seeds in structures raised above ground to protect from moisture and pests.
Desiccants for Seed Storage
In humid climates, desiccants can help keep seeds dry:
- Rice: Thoroughly dried rice grains (baked at low temperature until completely dry)
- Charcoal: Crushed charcoal pieces, thoroughly dried
- Clay: Fired clay pieces or powdered clay, thoroughly dried
- Milk powder: Powdered milk that has been thoroughly dried
Place desiccants in a cloth bag or paper envelope inside your seed container, but not in direct contact with seeds. Replace when they become saturated with moisture.
Labeling
Proper labeling is essential for maintaining seed identity:
- Include crop name, variety name, harvest date, and any special characteristics
- Use waterproof ink or pencil (not water-soluble ink)
- Place labels both inside and outside containers when possible
- Consider including photos or drawings for varieties with distinctive appearances
Testing Seed Viability
Before planting or sharing saved seeds, it's important to test their viability (ability to germinate). This is especially important for older seeds or those stored in less-than-ideal conditions.
Simple Germination Test
1
Count Seeds
Take a sample of 10-100 seeds, depending on how many you have available. Larger samples give more accurate results.
2
Prepare Medium
Moisten a paper towel, cloth, or cotton wool. It should be damp but not dripping wet.
3
Place Seeds
Arrange seeds on the damp medium, leaving space between them.
4
Cover and Seal
Cover with another damp paper towel or cloth. Place in a plastic bag or container to maintain moisture.
5
Provide Warmth
Keep at a warm temperature appropriate for the crop (typically 20-30°C or 68-86°F).
6
Check Regularly
Monitor every few days, keeping the medium moist. Most vegetable seeds germinate within 3-10 days.
7
Calculate Germination Rate
Count how many seeds germinate and calculate the percentage:
(Number of germinated seeds ÷ Total number of seeds tested) × 100 = Germination percentage
Interpreting Results
- 80-100%: Excellent viability. Use normal seeding rates.
- 60-80%: Good viability. Increase seeding rates slightly.
- 40-60%: Fair viability. Double your seeding rates.
- Below 40%: Poor viability. Consider using newer seeds if available, or greatly increase seeding rates.
Alternative Quick Tests
For a faster but less accurate assessment:
- Float test: Place seeds in water; those that sink are usually viable, while those that float are often empty or damaged. This works best for larger seeds like beans and maize but is not reliable for all crops.
- Cut test: Cut a few seeds in half. Viable seeds should have firm, appropriately colored interiors that fill the seed coat. This destroys the tested seeds but can quickly indicate overall quality.
Crop-Specific Seed Saving Guide
Different crops require specific approaches to seed saving. Here are guidelines for some common African food crops:
Grains and Pulses
Maize (Corn)
- Pollination: Cross-pollinating (wind)
- Isolation: 1-2 km for complete isolation; 300-500 m may be sufficient with barriers
- Selection: Choose plants with desirable traits (drought tolerance, pest resistance, yield, flavor)
- Harvest: Allow ears to dry on stalks until husks are completely dry
- Processing: Remove husks, dry further if needed, shell kernels by hand or with tools
- Storage: Store in airtight containers with desiccants in humid areas
Sorghum and Millet
- Pollination: Primarily self-pollinating with some cross-pollination
- Isolation: 200-300 m between varieties
- Selection: Select for head size, disease resistance, and drought tolerance
- Harvest: Cut seed heads when grains are hard and dry
- Processing: Thresh by beating or rubbing, winnow to remove chaff
- Storage: Similar to maize; traditional methods often include ash mixing
Beans and Cowpeas
- Pollination: Self-pollinating
- Isolation: 10-20 m between varieties (minimal isolation needed)
- Selection: Select for pod production, disease resistance, and cooking quality
- Harvest: Allow pods to dry completely on plants until brittle
- Processing: Shell by hand or by beating in bags, winnow to clean
- Storage: Ensure complete drying; adding neem leaves helps control weevils
Vegetables
Tomatoes
- Pollination: Self-pollinating
- Isolation: 3-5 m between varieties (minimal isolation needed)
- Selection: Choose fruits from healthiest plants with desired traits
- Harvest: Allow fruits to fully ripen on the vine until soft
- Processing: Squeeze out seeds with pulp, ferment 2-3 days, wash and dry
- Storage: Store in cool, dry conditions; seeds remain viable for 4-6 years
Peppers (Hot and Sweet)
- Pollination: Primarily self-pollinating with some cross-pollination
- Isolation: 50-100 m between varieties
- Selection: Allow fruits to fully ripen (usually red, yellow, or orange)
- Harvest: Pick fully colored, mature fruits
- Processing: Cut open, scrape out seeds, dry without washing (wear gloves for hot peppers)
- Storage: Store in cool, dry conditions; seeds remain viable for 2-3 years
Okra
- Pollination: Self-pollinating with some cross-pollination
- Isolation: 500 m between varieties for complete purity
- Selection: Select for pod quality, disease resistance, and productivity
- Harvest: Allow pods to mature fully and dry on the plant
- Processing: Break open dried pods, remove seeds, clean if necessary
- Storage: Store in cool, dry conditions; seeds remain viable for 2-3 years
Amaranth (Leafy and Grain Types)
- Pollination: Cross-pollinating (wind)
- Isolation: 1-2 km between varieties
- Selection: Select for leaf quality (leafy types) or seed head size (grain types)
- Harvest: For grain types, cut seed heads when mature but before shattering
- Processing: Dry seed heads, thresh by rubbing, winnow carefully (seeds are very small)
- Storage: Store in airtight containers; seeds remain viable for 3-5 years
Cucurbits (Squash, Melons, Cucumbers)
- Pollination: Cross-pollinating (insects)
- Isolation: 800 m to 1 km between varieties of the same species
- Selection: Allow fruits to fully mature beyond eating stage
- Harvest: Harvest when fruits are fully mature (often when stems are dry)
- Processing: Cut open, scoop out seeds with pulp, ferment 2-3 days, wash and dry
- Storage: Store in cool, dry conditions; seeds remain viable for 5-6 years

Detailed Crop-Specific Seed Saving Guide
Download our comprehensive guide with detailed information on saving seeds from over 30 common African crops, including isolation distances, processing techniques, and storage recommendations.
Download PDF
Seed saving becomes more powerful when practiced as a community activity. Collective efforts can preserve more varieties and knowledge than individuals working alone.
Community Seed Banks
Community seed banks serve as living libraries of local crop diversity:
- Preserve a wider range of varieties than individual farmers can maintain
- Provide backup seeds in case of crop failure or disaster
- Serve as centers for seed-related knowledge exchange
- Strengthen community resilience and food sovereignty
1
Starting a Community Seed Bank
Begin with a small group of committed seed savers:
- Identify a secure, cool, dry location for seed storage
- Create a simple record-keeping system
- Establish protocols for seed quality, testing, and distribution
- Start with locally important crops and gradually expand
2
Managing a Seed Bank
Sustainable management practices include:
- Regularly growing out stored seeds to maintain viability
- Distributing responsibility for different crops among community members
- Documenting traditional knowledge associated with each variety
- Training new seed savers to ensure knowledge transmission
3
Distribution Systems
Develop fair and sustainable ways to share seeds:
- Seed exchanges or swaps where members trade varieties
- Loan systems where borrowers return a portion of seeds after harvest
- Community seed fairs to celebrate diversity and share knowledge
- Training programs for new seed savers
Seed Sovereignty Networks
Connecting community seed initiatives creates stronger networks for seed sovereignty:
- Regional seed exchanges to share locally adapted varieties
- Knowledge-sharing platforms (in-person or digital)
- Collaborative research on participatory plant breeding
- Advocacy for policies that protect farmers' rights to save and share seeds
Documenting Traditional Knowledge
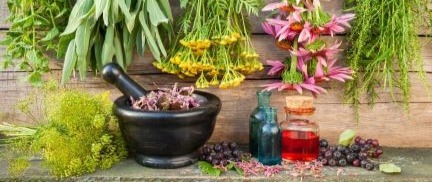
Seeds carry not just genetic material but cultural knowledge. When saving traditional varieties, document:
- Local names and their meanings
- Traditional growing practices
- Culinary uses and preparation methods
- Cultural significance and stories
- Medicinal or other non-food uses
This information is as valuable as the seeds themselves and should be preserved alongside them.
Challenges and Solutions
Seed savers face various challenges, but most can be overcome with appropriate strategies:
Climate Challenges
1
High Humidity
In humid climates, seeds can absorb moisture and lose viability quickly.
Solutions:
- Harvest during the driest season when possible
- Use desiccants in storage containers
- Consider solar dryers for initial seed drying
- Use airtight containers with good seals
2
High Temperatures
Heat accelerates seed deterioration.
Solutions:
- Store seeds in the coolest available location (underground spaces, clay pots)
- Ensure seeds are very dry before storage
- Consider community refrigeration for valuable seeds if available
- Grow out seeds more frequently in hot climates
Biological Challenges
3
Pests and Diseases
Insects, rodents, and pathogens can damage stored seeds.
Solutions:
- Use traditional botanical preservatives (neem, eucalyptus, etc.)
- Ensure containers are sealed against pests
- Regularly inspect stored seeds
- Practice good sanitation during processing
4
Cross-Pollination
Unwanted crosses can affect variety purity.
Solutions:
- Understand crop pollination biology
- Use appropriate isolation distances or barriers
- Practice hand pollination for small quantities of valuable varieties
- Coordinate with neighbors to grow different varieties in different seasons
Social and Economic Challenges
5
Knowledge Loss
Traditional seed saving knowledge is disappearing in many communities.
Solutions:
- Document practices from elders and experienced farmers
- Include youth in seed saving activities
- Integrate seed saving into school curricula
- Create community events celebrating seed diversity
6
Market Pressures
Commercial seed systems and market demands can marginalize traditional varieties.
Solutions:
- Develop local markets that value crop diversity
- Educate consumers about the benefits of traditional varieties
- Form cooperatives to share resources and marketing
- Advocate for policies that support farmer-managed seed systems
Legal Considerations
Be aware of seed laws and regulations in your country:
- Some countries restrict farmers' rights to save, exchange, or sell seeds
- Certain varieties may be protected by intellectual property rights
- Seed quality regulations may apply to formal seed exchanges or sales
Connect with local seed sovereignty organizations to understand the legal context in your area.
Additional Resources
To deepen your seed saving knowledge and connect with others:
Dilulu's Seed Saving Programs
- Seed Keeper Training: Hands-on workshops in communities across Africa
- Community Seed Bank Support: Technical assistance for establishing and managing seed banks
- Seed Diversity Kits: Collections of traditional varieties with training materials
- Seed Sovereignty Network: Connecting seed savers across regions
To learn more about these programs or to find resources in your area, visit our Seed Sovereignty Programs page or contact our regional office.
Partner Organizations
- African Centre for Biodiversity: Research and advocacy on seed sovereignty
- Alliance for Food Sovereignty in Africa (AFSA): Continental alliance supporting farmer-managed seed systems
- Seed Savers Network Kenya: Community-based seed saving initiatives
- PELUM Association: Network promoting ecological land use management

About the Author
Samuel Nkurunziza is a seed sovereignty specialist with over 20 years of experience working with farming communities across East Africa. He has helped establish more than 30 community seed banks and documented hundreds of traditional crop varieties. Samuel leads Dilulu's Seed Sovereignty program and conducts training throughout the continent.